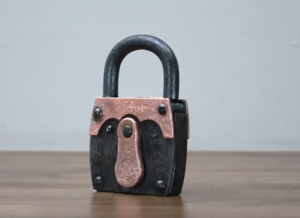
step-by-step guide on restoring and fixing the copper plating on a 1936 ‘Burg’ padlock:

Step-by-Step Restoration Process for Copper Plating:
1. Preparation and Safety:
- Safety Gear: Wear protective gloves, goggles, and a mask to avoid inhaling dust and fumes.
- Tools Needed: You’ll need fine sandpaper (400-1000 grit), a soft-bristle brush, copper cleaning solution, metal polish, copper plating solution, and a power source if doing electroplating.
2. Assess the Condition:
- Examine the padlock for areas where copper plating is worn or damaged.
- Identify any rust or corrosion that might have formed underneath the old copper plating.
3. Remove Rust and Old Plating:
- Wire Brush and Sandpaper: Use a soft-bristle brush to remove surface dirt and light corrosion. Sand the padlock gently with 400-1000 grit sandpaper to smooth out the surface and remove the remaining copper plating if needed.
- Degreaser: Clean the padlock with a degreaser (like Simple Green) to eliminate oils and dirt. Rinse with water and dry it thoroughly.

4. Clean and Polish the Metal:
- Copper Cleaner: Use a copper cleaner or metal polish (like Brasso) to remove tarnish and shine up the remaining copper.
- Polish: Buff the padlock using a microfiber cloth, working in small circles to bring out the shine. This will help create a smooth surface for re-plating.
5. Prepare for Copper Plating:
- Electroplating Setup: You can use a simple electroplating kit for small parts like padlocks. These kits are available online and include the necessary chemicals and instructions. The basic setup involves:
- Copper Plating Solution: Purchase a quality copper sulfate solution (available from online stores like Amazon or suppliers like Caswell Plating).
- Power Source: You’ll need a DC power supply or battery (around 6-12 volts).
- Copper Anode: A piece of pure copper will act as the anode.

6. Copper Electroplating Process:
- Prepare the Solution: Mix the copper plating solution according to the product instructions.
- Set up the Electroplating:
- Attach the padlock (acting as the cathode) to the negative terminal of your power source.
- Attach the copper anode to the positive terminal.
- Submerge in Solution: Submerge both the padlock and the copper anode into the plating solution, ensuring they don’t touch.
- Electroplate: Turn on the power and allow the plating to occur. The copper ions from the anode will bond to the padlock. This process may take 20-40 minutes, depending on the condition and thickness of the plating you want.
- Monitor the Process: Check regularly to ensure even coating. If uneven, you can remove the padlock and re-sand lightly before continuing.
7. Rinse and Dry:
- After the electroplating process, rinse the padlock thoroughly in distilled water and dry it with a lint-free cloth.

8. Final Polish:
- Metal Polish: Once the copper plating has dried, apply a metal polish or copper polish to enhance the shine and protect the new plating.
- Seal: Optionally, apply a clear lacquer or metal sealant to protect the copper plating from tarnishing over time.

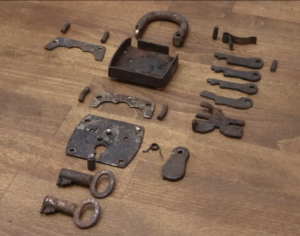
9. Reassemble (if disassembled):
- Reassemble any parts you may have removed for cleaning, ensuring all components fit securely.
10. Test the Lock:
- Once reassembled, test the padlock to ensure it functions correctly and smoothly.


